Base Database LibreOffice
Base Database LibreOffice
What Will I Learn?
- How to make a Database with LibreOffice
- How to Make a Form
- How to use Wizard on tools
Requirements
System Requirements
No special requirements.OS Support
Microsoft Windows (IA-32 and x86-64), Linux (IA-32 and x86-64) and macOS (x86-64).Requirements
Program Install Support: Install and Uninstall
Difficulty
Intermediate
Information
Website & Download: https://www.libreoffice.org/
Type : Office suite software
License : The LibreOffice project uses a dual LGPLv3 (or later) / MPL 2.0 license
Operating System : Linux, OS X, Microsoft Windows, Solaris
Platform : IA-32, x86-64, PowerPC, SPARC
Tutorial Contents
LibreOffice is the open source office software for word processing, spreadsheets, presentations, graphics design, databases and math. It can be downloaded and used completely free for any purpose. at this time i will give tutorial how to make a form and make database from libreoffice.
The Step of Tutorial
open the libreoffice application and select database base.
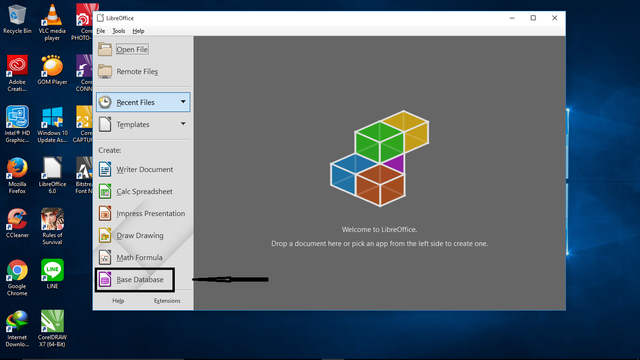
LibreOffice Base Database is relational database applications similar to Microsoft Access. LibreOffice Base enables database creation and management, the preparation of forms and reports for easy data access by end users. Like Access, Base can be used as an embedded small database, stored in document files (using Java-based HSQLDB as its storage engine), and for heavier jobs can also be used as a front-end for various systems database, including Access database (JET), ODBC / JDBC data source, and MySQL, MariaDB, PostgreSQL or Microsoft Access.then select the database and click the next button on the bottom to continue on the next step.
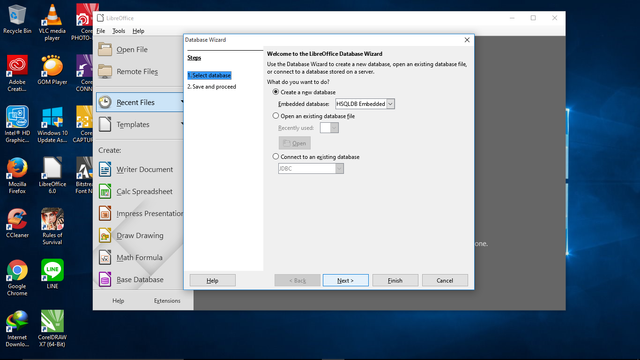
after you klik next button and then choose the icon if you not yet have the database before.
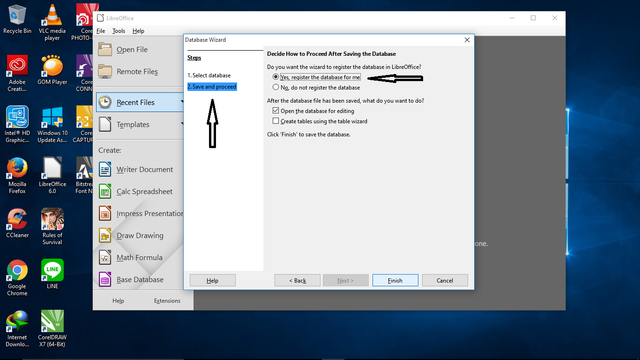
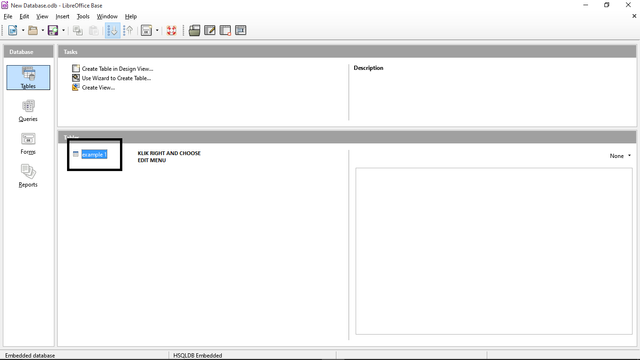
after you have completed the previous step then will appear a box that contains about tables, queries, forms and reports. Then you choose to create a table in design view so that raises table table you have to design If you want to create a form.
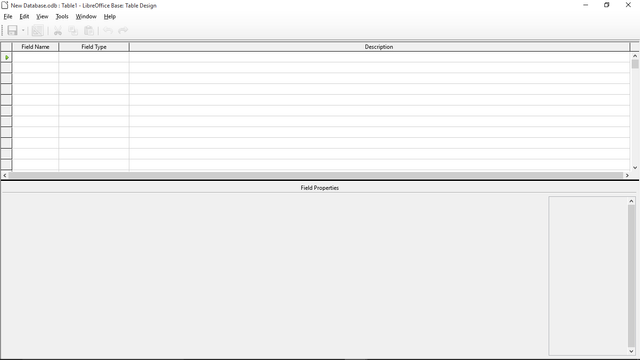
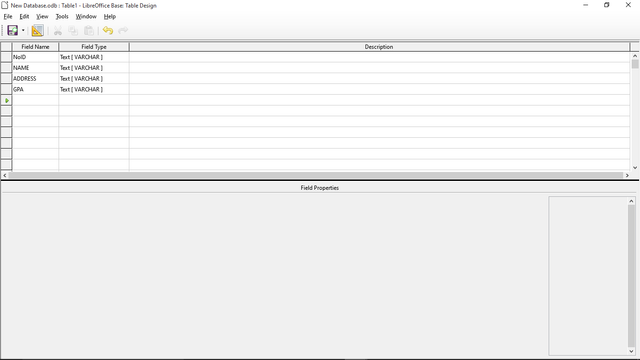
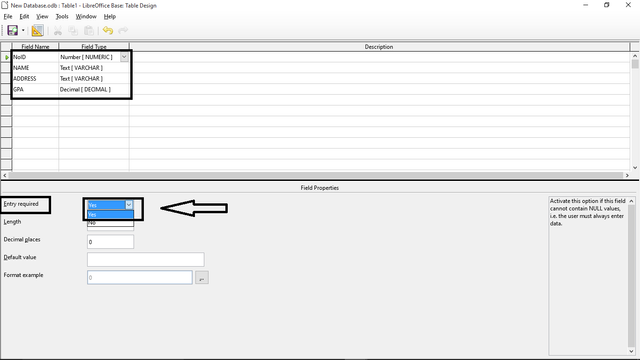
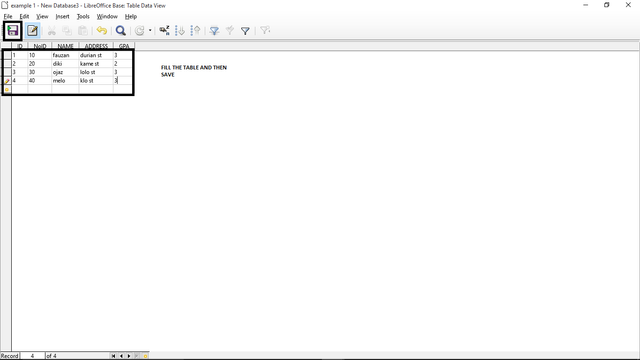
Then you fill the table table with some things Example as I made there is the ID number, address ,name, then the GPA.PRIMARY KEY
in the required entry under which the arrow you are marked change the entire field name and field type to yes.
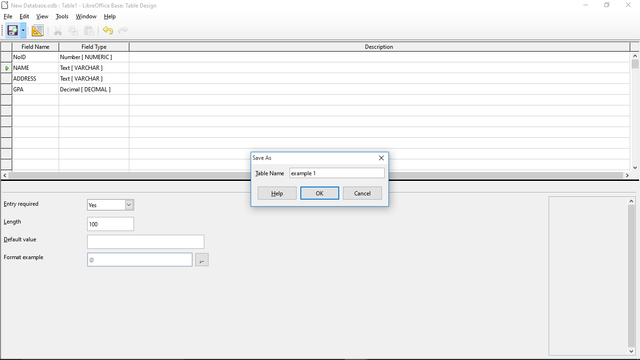
then after doing so then save the file you created with the name of example 1.
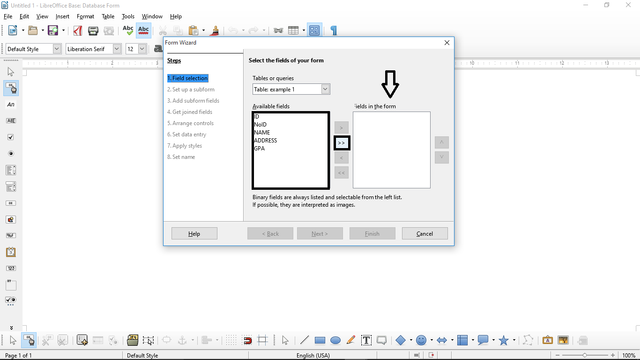
Next step you close the box Then you go to the form menu, and select the menu use wizards to create form.

use wizards to create form in order to make it easier for every user to create a form without creating it manually. in use wizards to create this form have been provided some things in need to create a form.

then fill in the box that is available in addition to the database that you created earlier in order to facilitate us memelakukan next step.
after filling with the guide above then the next button pressed to finish. but in the choice of arrange controls you can select several types of forms that exist in the wizard will automatically be formed.
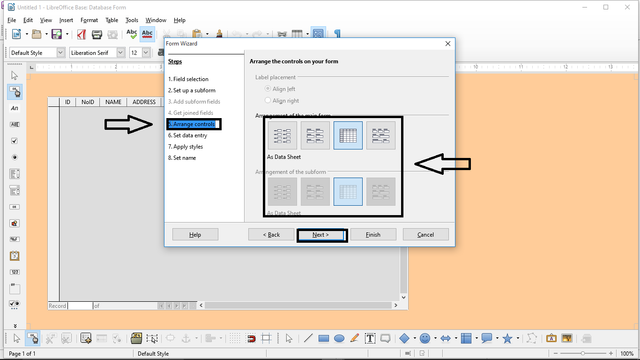
I myself use the first number wizard equipment because it fits perfectly with the form I'm going to make .
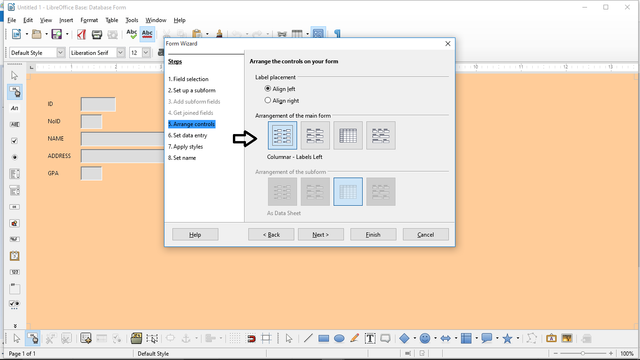
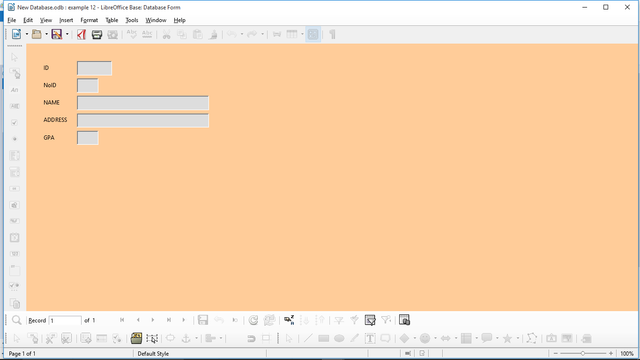
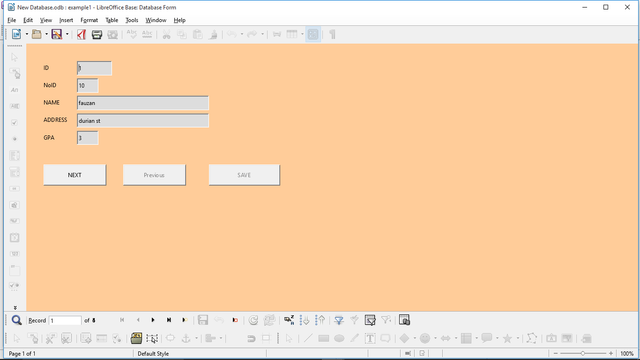
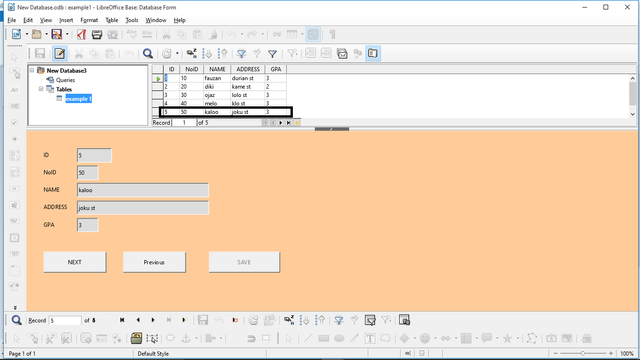
Then you Click the finish button when finished in your work choose the form you want then Click save button to save the box or the form you want to make. then will appear the example of the form you want.
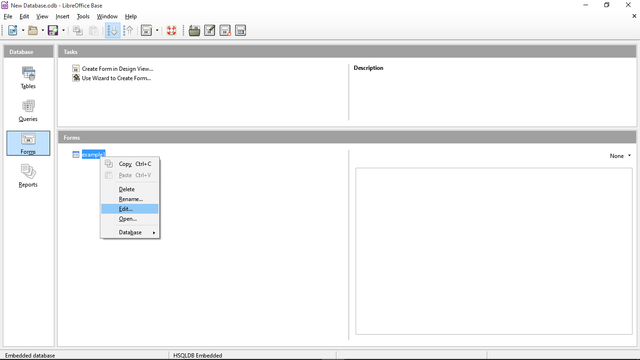
Then Click the close button to exit to base base database as below. to make edits on the form you want like If you want to add the next previous button and save it is very easy that is by Right Click on your mouse then select the edit menu to do it.
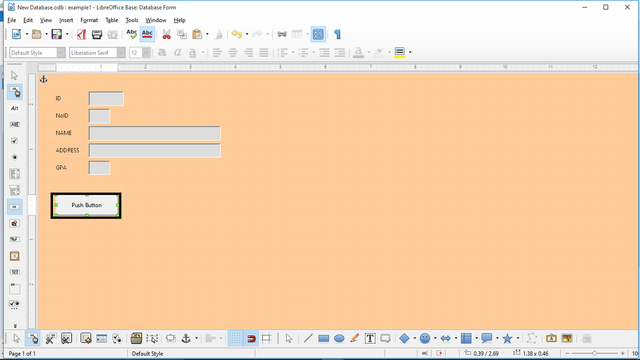
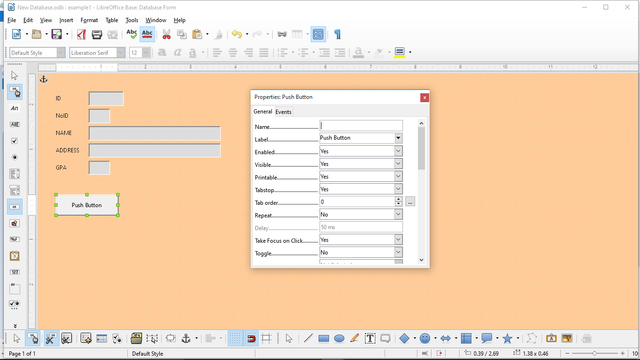
select the push button to add a button on your form.
Then double click on the push button box then change its name level with its name next and the label is replaced with next too, so the name on the label is changed to next.
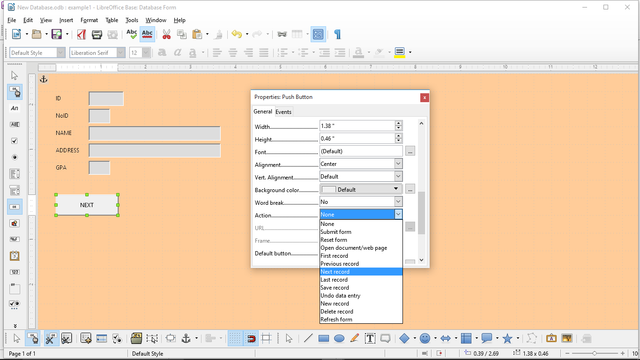
and then change the action to become a next button on your form.
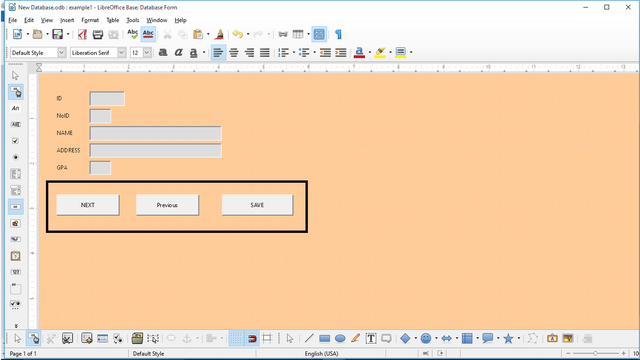
then If you want to add previous and save button then do the same thing as before
if you have done the previous step correctly then you next save the form and then you go back to the tables in the basic options, then right click on your mouse to do the initial database filling for a form you want to make.
contents of the table with the id number, name, address and GPA someone, and for example as follows.
save the example you have created, then click the close button and return again on the form in the base database options.and go directly to the example that you created earlier so that automatically generate the person you have registered earlier.
then you can see the next list by using the nect button, and if you want to go back then click the previous button.then last if you want to insert a new name into your form, then you just need to fill in the boxes on your form with different numbers and different names.
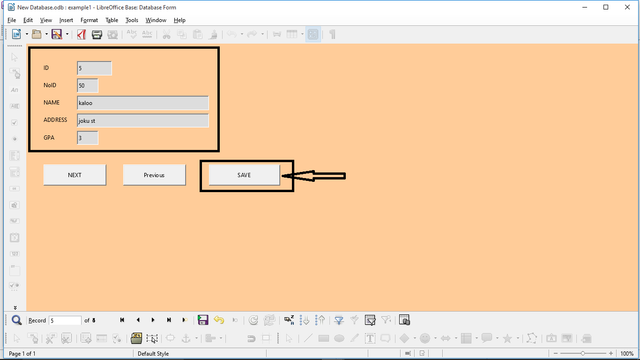
then click the save button to save it into the database you have created.

so automatically the new name you enter has entered in the database that you have created before.
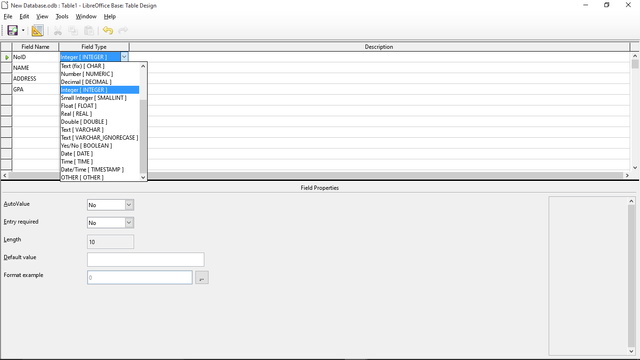
After you do this then beside the ID number and others there is a
file type and then there is a vharchar text. Then you change the
vharchar text from ID number to integer. Then the IPK is converted to
decimal.
Then the IPK is converted to decimal.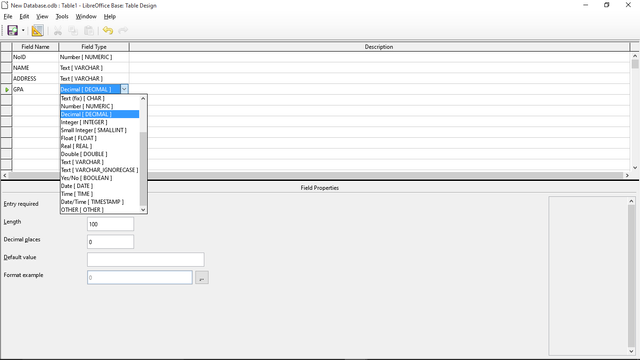
the steps are used to facilitate each user to perform a valid number and decimal number.